


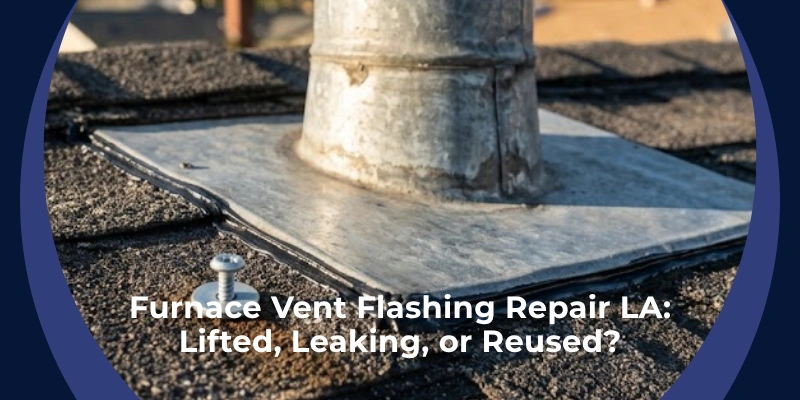
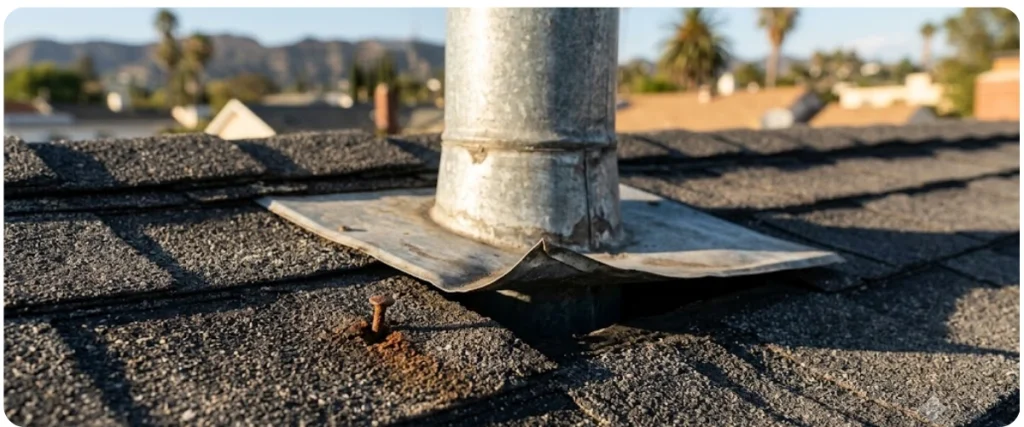
You went up on the roof to trim a tree and noticed something that wasn’t there before — the furnace exhaust vent flashing is lifted a half inch off the surface, an old nail isn’t holding, and there are exposed nail holes you’re not sure what to do with. Your roofer reused the original flashing when they replaced your roof a few years ago. Now you’re wondering whether this is a DIY fix or something more serious.
The short answer is that lifted vent flashing is a legitimate concern that needs to be addressed before the next rain. The longer answer is that how it got there matters as much as how you fix it — and in many cases, reused flashing on a new roof installation is a corner-cutting practice that sets homeowners up for exactly this kind of problem.
Here’s what’s happening, what the correct repair looks like, and when a licensed contractor needs to be involved.
🔍 Concerned About Your Roof’s Flashing or Vent Condition?
Lifted flashing and exposed nail holes are often symptoms of a larger installation problem. Our licensed inspectors assess the full picture — free, no pressure, no obligation.
Schedule Your Free Roof Inspection →Why Reusing Old Flashing Is a Red Flag
When a roofing company replaces your roof, every component of the roofing system should either be replaced or evaluated and documented as still serviceable. Flashing — the metal components that seal around penetrations like vent pipes, chimneys, and exhaust stacks — is one of the areas where corners get cut most frequently, because reusing old flashing saves the contractor material cost and installation time without being immediately visible to the homeowner.
What Reused Flashing Means for Long-Term Performance
Old flashing that’s been on a roof for 15 or 20 years has already experienced significant thermal cycling — the daily expansion and contraction caused by temperature changes. The metal has fatigued at the bends, the sealant underneath has dried and cracked, and the fastener holes have enlarged from years of that same movement. When a contractor installs new shingles around old flashing without replacing it, they’re building a fresh installation around the weakest link in the system.
The lifted flashing scenario described here is a predictable outcome. Old fasteners that were adequate in their original holes lose grip as those holes enlarge. The flashing lifts at the edges, creating an entry point for water that runs under the flashing rather than over it. These are classic signs of roof installation problems in Los Angeles that homeowners rarely discover until they go up on the roof themselves.
How Old Fastener Holes Compound the Problem
Every original nail hole in the flashing is now an exposed penetration through the metal into the substrate below. If those nail holes are not properly sealed, each one is a direct water path into the roof deck every time water reaches that area. In Los Angeles, where rain events are infrequent but often intense when they occur, a single storm can drive significant water through a half-dozen unsecured nail holes — particularly when the flashing itself is lifted and channeling water toward rather than away from those points.
The detail work quality of ridge cap installation quality in Los Angeles and flashing installation follow the same principle: shortcuts that aren’t visible from the ground eventually reveal themselves when water finds the path of least resistance.
What Happens When Flashing Lifts and Fasteners Fail
Understanding the failure sequence helps you evaluate how urgent your situation is and what the correct scope of repair needs to be.
The Water Pathway Through Lifted Flashing
When vent flashing lifts off the roof surface — even a small amount — it creates a gap that water can enter during rain. Water doesn’t need much space. A half-inch lift at the edge of a flashing pan is more than enough for rain driven at any angle to get underneath. Once under the flashing, water contacts the underlayment or, if the underlayment seal has also failed, the roof deck directly.
From there, water travels by gravity and capillary action until it finds a gap — which could be a nail hole, a seam in the deck, or a joint in the framing — and begins working its way toward your ceiling. This is the exact pathway that turns a small flashing problem into a roof vent leaking in Los Angeles scenario that damages insulation, framing, and interior finishes before the homeowner ever sees a water stain.
Why Exposed Nail Holes Are Independently Dangerous
Even if the flashing itself were lying flat, exposed nail holes that pass through the metal without being properly sealed are their own leak risk. Water pooling on the flashing surface — from rain or from debris accumulation around the vent pipe — will find those holes and pass through them. This is why the repair sequence matters as much as the repair itself: sealing existing holes is not optional, and doing it in the wrong order creates new problems.
The Correct Way to Fix Lifted Furnace Vent Flashing
This is where the Reddit thread’s advice is largely correct, but worth organizing into a clear sequence so the repair actually holds.
Step 1 — Assess Before You Fasten
Before adding any new fasteners, lift the raised edge carefully and inspect what’s underneath. You’re looking for signs of existing moisture damage — dark staining on the underlayment, soft spots in the deck, or visible deterioration of the mastic or sealant that should be bonding the flashing to the surface. If you find significant moisture damage or soft deck material, stop and call a licensed contractor. What looks like a flashing fix may have a larger scope underneath.
Step 2 — Use Neoprene-Washer Screws, Not Nails
This is the most important technical detail in the repair. Nails back out — especially in old, enlarged holes where the wood has lost its grip. The correct fastener for this repair is a neoprene-washer roofing screw, typically 1.5 inches long and 10-gauge for this application. The neoprene washer compresses when the screw is driven, creating a seal at the fastener head without relying on sealant alone.
Existing nail holes that are too large to hold a screw should be addressed separately with mastic. Don’t attempt to drive a new fastener into a hole that’s already oversized — it won’t hold and you’ll make the hole larger in the process.
Step 3 — Apply Mastic in the Correct Sequence
Roofing mastic — sometimes called roof cement or flashing cement — is the bonding and sealing agent that holds the flashing flat against the roof surface. The application sequence is critical and frequently done wrong:
Apply mastic under the raised flashing edges before fastening. This ensures the flashing is bonded to the surface, not just mechanically attached at a single point. Run mastic along the sides of the flashing where it meets the shingles. Seal any existing exposed nail holes from above with a dab of mastic or an appropriate sealant after the flashing is re-secured. Do not run mastic along the bottom edge of the flashing — the bottom must remain open to allow any water that gets under the flashing to drain out rather than being trapped against the deck.
This drainage principle is the same one that governs roof drip edge and flashing in Los Angeles installations — water must always have a path out, and sealing the bottom edge defeats that purpose entirely.
Step 4 — Seal Screw Heads Correctly
New neoprene-washer screws don’t require additional sealant over the head if they’re driven correctly and the washer is fully compressed. If you’re using standard screws without neoprene washers, each head needs a dab of sealant. Some contractors use colored sealant matched to the shingle or flashing color to minimize visual impact.
💰 Don’t Let a Small Flashing Problem Become a Big Repair Bill
Lifted flashing caught early is a minor repair. Left unaddressed through a rainy season, it becomes water damage, deck rot, and interior staining. US Power provides honest assessments and transparent quotes — no inflated scopes, no pressure.
Get Your Free Quote →When a DIY Fix Is Enough vs. When to Call a Contractor
Not every lifted flashing situation requires professional intervention. Here’s how to evaluate where yours falls.
When DIY Is Appropriate
If the flashing is lifting at one edge but otherwise in good condition — no cracks in the metal, no severe corrosion, no evidence of moisture below — and the underlying deck feels solid when pressed, a DIY repair using neoprene screws and roofing mastic is a reasonable approach. The materials are inexpensive and available at any hardware store, and the repair sequence described above can be completed in under an hour by a careful homeowner comfortable working on a roof.
When You Need a Licensed Contractor
Several conditions move this from a DIY repair into professional territory. If you find soft or spongy deck material under the lifted flashing, there is likely moisture damage to the substrate that needs to be assessed and potentially repaired before re-securing the flashing. If the flashing itself is cracked, corroded, or has physical damage beyond lifted edges, it needs to be replaced rather than re-secured — and replacement requires lifting adjacent shingles and integrating new flashing into the existing shingle coursing correctly.
If your roof is still within a workmanship warranty period from your original contractor, a flashing failure caused by reusing old components may be a covered warranty claim. Understanding what roofing warranties actually cover before authorizing any repair work protects your ability to pursue that claim. Reviewing roof replacement cost in Los Angeles also helps you understand what a proper full flashing replacement scope costs relative to a patch repair, so you can make an informed decision about which approach makes more sense for your roof’s overall condition and age.
Does Reused Flashing Affect Your Roof Warranty?
This is one of the most important questions homeowners with reused flashing need to answer — and the answer is often yes, in ways that matter.
What Most Warranties Say About Existing Components
Most manufacturer roofing warranties require that the installation follow the manufacturer’s published installation guidelines, which typically specify new flashing components when the full roofing system is replaced. A contractor who reuses existing flashing during a warranted installation may have installed the system in a way that doesn’t meet the manufacturer’s specification — which can create grounds for warranty claim denial if water damage occurs at or near a penetration.
This is separate from the workmanship warranty the contractor provides. A workmanship warranty from the contractor who reused the old flashing may cover the labor to repair a failure, but it doesn’t restore a manufacturer warranty that was undermined by the installation approach.
Documenting the Situation
If you’re still within your workmanship warranty period, photograph the lifted flashing, the exposed nail holes, and any visible moisture damage before doing any repair work. This documentation creates a record of the condition and the timeline that’s essential if you pursue a warranty claim against the original contractor.
What US Power Does Differently
At US Power, flashing replacement is never optional during a full roof installation. Every furnace exhaust vent, plumbing stack, and roof penetration receives new flashing components — correctly integrated into the shingle coursing with mastic applied in the right sequence and fasteners that won’t back out over time.
We are CSLB-licensed and serve Los Angeles homeowners throughout the San Fernando Valley, the Westside, the South Bay, and surrounding communities. Our 180+ five-star Google reviews reflect a process built on doing the detail work correctly the first time rather than explaining away failures after the fact.
If you’re dealing with lifted or reused flashing from a previous installation, how to hire a roofing contractor in Los Angeles for an honest second opinion starts with finding a licensed contractor who will document what they find rather than minimize it. We offer free inspections and transparent quotes — no pressure, no inflated scopes, just a clear picture of what your roof actually needs.
⭐ 180+ Five-Star Reviews from Los Angeles Homeowners
US Power replaces all flashing components on every installation — no reused parts, no shortcuts. Backed by a Limited Lifetime Warranty and transparent, no-hidden-fee pricing.
Work with Licensed Experts →Solar-Ready Roofing: Why Flashing Detail Work Matters More Than Ever
If solar panels are part of your plans, the quality of every existing roof penetration — including furnace exhaust vents — matters significantly. Solar installations add new penetrations and racking attachment points to the roof, and any existing weakness in flashing or sealant at nearby penetrations becomes a compounding risk.
Flashing Condition Is Part of Solar Readiness
A solar-ready roof installation in Los Angeles means every existing penetration is in sound condition before panels go on. A lifted or reused flashing at a furnace exhaust vent that sits near a proposed panel array is exactly the kind of detail that needs to be corrected before solar installation, not discovered afterward when the panels are in the way.
Doing the Full Scope at Once
If your roof has multiple flashing concerns — reused components, lifted edges, exposed nail holes — addressing them all in a single scope before solar installation is always more cost-effective than correcting them piecemeal after the panels are in place. US Power can assess your full roof penetration condition and provide a complete scope that sets your home up correctly for solar when the time comes.
☀️ Fix Your Flashing and Set Your Roof Up for Solar
US Power installs solar-ready roofing with correct flashing at every penetration — so your roof is sound before panels go on, not patched up afterward.
Explore Solar-Ready Roofing →Fix It Before Rain Season — Then Ask Why It Happened
A lifted furnace exhaust vent flashing in Los Angeles is a repair that needs to happen before the next rain event, not after. The correct approach is neoprene-washer screws, mastic applied in the right sequence, and sealed nail holes — with the bottom edge left open to drain.
The more important question is why it happened. Reused flashing on a new roof installation is a legitimate installation shortcut that sets homeowners up for exactly this kind of premature failure. If your roof is still within a warranty period, document the condition and understand your options before authorizing any repair work. US Power offers free inspections for homeowners dealing with flashing concerns — we’ll give you an honest picture of what needs to be done and who should be doing it.
Frequently Asked Questions About Furnace Vent Flashing Repair
Is it safe to use nails instead of screws to re-secure lifted flashing?
No, not in existing holes. Nails that have already backed out of their original holes have lost their grip in the surrounding wood. A neoprene-washer roofing screw driven into the same hole — or into a new location — provides significantly better holding power and includes a built-in seal at the fastener head. Nails should not be used as a repair fastener where the original nail has already failed.
What sealant should I use on roof flashing in Los Angeles?
Roofing mastic, also called roof cement or flashing cement, is the appropriate material for bonding and sealing flashing components. It remains flexible through temperature cycling, bonds reliably to both metal and asphalt surfaces, and is compatible with all common roofing materials. Standard silicone or latex caulk is not an appropriate substitute for roofing mastic in flashing applications.
Should I seal the bottom edge of the flashing?
No. The bottom edge of flashing must remain unsealed to allow any water that infiltrates the flashing area to drain out rather than being trapped against the deck. Sealing the bottom edge is a common DIY mistake that traps moisture and accelerates deck damage. Only the sides and top edge should be sealed with mastic.
Can I tell from the ground if my vent flashing is lifted?
In most cases, no. Lifted flashing is typically only visible from the roof surface itself, which is why it’s commonly discovered during tree trimming or gutter cleaning rather than during a ground-level inspection. If your roof has reused flashing from a recent installation, a periodic visual inspection from the roof is worthwhile, particularly before and after LA’s rainy season.
Does a roofer have to replace flashing during a full roof replacement?
Industry best practice and most manufacturer installation guidelines specify new flashing components when a full roofing system is replaced. Reusing existing flashing is a cost-cutting measure that can affect installation quality, warranty coverage, and long-term performance. A legitimate contractor should clearly indicate in their quote whether flashing is included as new or reused, and homeowners should ask specifically before signing.


